Can you wear a mesh jacket in winter? Yes — if you layer correctly. Wind chill math, thermal base layers, liner compatibility, and what to wear under a textile jacket explained.
Table of Contents
Can You Wear a Mesh Jacket in Winter & What to Actually Layer Underneath
You bought a mesh jacket for summer. Now it’s getting cold and you’re wondering if you can use it in winter or whether you need a completely different jacket. Most riders either freeze trying or give up and buy something new they didn’t need.
The answer depends on speed, temperature, and what you wear underneath, not just the jacket itself.
What Wind Chill Actually Does at Riding Speeds?
This is the number nobody shows you before you head out in a mesh jacket on a cold morning.
Wind chill at riding speed drops the felt temperature significantly below the actual air temperature. At 30mph in 10°C air, the felt temperature drops to approximately 2°C. At 60mph in the same 10°C air, it drops to around -4°C. That difference is not just uncomfortable, it is dangerous for sustained exposure without the right layering underneath.
Air Temp
Speed
Felt Temperature
10°C / 50°F
30mph
~2°C / 35°F
10°C / 50°F
60mph
~-4°C / 25°F
5°C / 41°F
30mph
~-3°C / 27°F
5°C / 41°F
60mph
~-10°C / 14°F
A mesh jacket at 60mph in 5°C air gives you almost no barrier against that felt temperature. Your layering underneath is doing all the work.
Can You Wear a Mesh Jacket in Winter
Simple answer is Yes, down to about 7°C to 10°C ambient temperature, if you layer correctly and keep speeds moderate. Below that temperature, the mesh panels pass too much cold air regardless of what you wear underneath. At highway speeds in genuine winter temperatures, a mesh jacket becomes a liability rather than a solution.
The practical limit for mesh jacket winter use:
Urban riding under 40mph in temperatures above 7°C — manageable with proper layering
Motorway riding above 60mph in temperatures below 10°C — not advisable in mesh alone
Any temperature below 5°C — switch to a textile jacket with a thermal liner
Merino Wool vs Polypropylene vs Cotton: Which Base Layer Actually Works In Winter
The base layer is the most important part of cold weather layering and the most misunderstood. Most riders grab a hoodie. That’s the wrong call.
Cotton:
Cotton holds moisture against the skin when you sweat. Gets cold fast. Provides almost no insulation when wet. Wrong choice for riding in any temperature where you might sweat during the commute.
Polypropylene:
Polypropylene wicks moisture away from skin efficiently, dries fast, and is lighter than merino. Loses insulation value faster than merino in sustained cold but works well for shorter rides and urban commuting.
Merino wool:
Merino wool regulates temperature in both directions, manages moisture without feeling wet against the skin, and retains insulation even when damp. Heavier than polypropylene but significantly better for sustained cold exposure above 45 minutes of riding.
For riding specifically, merino wool base layers outperform polypropylene on rides longer than 30 minutes in cold weather. For short urban commutes, polypropylene is lighter and cheaper. Cotton is not a base layer — it is the reason riders arrive cold and damp.
What to Wear Under a Textile Jacket? Mid Layer Fit Guide
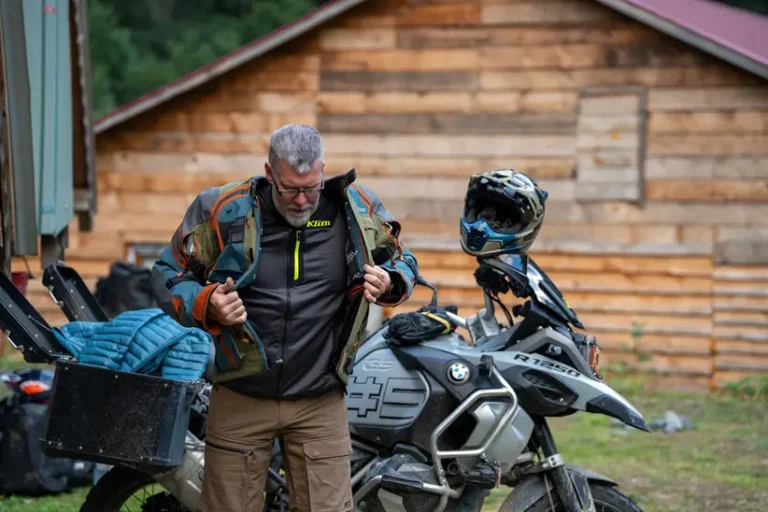
This is where most riders get it wrong. They buy the right mid layer and then can’t zip the jacket properly over it, which shifts the armor out of position.
How Mid Layers Need to Fit Under a Shell
The mid layer must sit close to the body without compressing it. A puffed-out mid layer pushes armor pockets away from the impact zones they’re designed to cover. Shoulder armor that sits 3cm off the shoulder joint is actually not protecting the shoulder joint.
What works under a textile jacket:
Thin merino or polypropylene base layer direct on skin
Slim-fit fleece or lightweight down gilet as mid layer — not a bulky puffer jacket
Total added bulk should allow the jacket to zip fully with all adjustability points closed
Adjustability Points That Actually Matter
A textile jacket fit guide that skips adjustability is useless. These are the points that determine whether your layering system works:
Cuffs — must close over mid layer without restricting wrist movement
Waist — drawcord or velcro adjustment should accommodate extra bulk without creating a gap at the back
Bicep and forearm — sleeve adjusters keep armor from sliding down the arm when a mid layer fills the sleeve
Collar — needs to close fully over a base layer without chafing at speed
If any of these points can’t close properly over your layering, the armor is not sitting correctly and the jacket is not performing as designed.
Liner Compatibility — What Fits and What Doesn’t
Most textile jackets come with a removable thermal liner that zips in at the collar and sometimes connects at the cuff. The problem is that aftermarket liners — bought separately because the original was lost or insufficient — are not standardized across brands.
What to check before buying a separate liner:
Zip type and position — most jackets use a continuous zip around the collar opening. Measure circumference before buying a third-party liner
Liner thickness — a 200g fill liner adds significant bulk inside the shell. Armor pocket fit changes when the liner is in
Cuff connection — some liners attach at the cuff to prevent riding up. Others are free-floating and bunch at the elbow under the shell
From a manufacturing standpoint, liner zipper specs vary even within the same brand across model years. If you’re buying an aftermarket liner, bring the jacket and physically test the zip connection before committing.
Textile vs Mesh Hot Weather: When to Switch
Going the other direction — riders with textile jackets trying to use them through summer face the opposite problem.
Textile jackets handle heat through zippered chest vents and mesh-lined inner panels. The ventilation strategy matters:
Open chest vents at speeds above 40mph — below that speed, airflow through the vents is insufficient to cool meaningfully
At speeds above 70mph, open vents create turbulence inside the jacket that works against cooling on some designs
Mesh-lined inner panels do most of the breathability work at low speeds — the vents matter most at motorway speeds
When Textile Ventilation Isn’t Enough
Above 35°C ambient temperature, a textile jacket with vents open still retains significantly more heat than a mesh jacket. The Cordura outer shell absorbs solar heat, the membrane blocks vapour movement even when breathable, and the liner — if left in — adds insulation you don’t want.
At that point, the honest answer is that mesh outperforms textile on breathability above 35°C regardless of how many vents the textile jacket has. The switch point between textile and mesh as the primary warm-weather jacket is approximately 28°C to 32°C depending on riding speed and sun exposure.
Kevlar Jeans for Beginners: What You Need to Know First
If you’re new to riding and considering Kevlar jeans as your lower-body protection, the fit requirements are different from regular jeans and most first-time buyers get this wrong.
Kevlar jeans need to fit snugly enough that the aramid lining panels sit directly over the knee and hip joints — not 4cm above or below them. Loose-fitting Kevlar jeans shift during riding and the lining migrates away from the impact zones it’s supposed to cover.
What to check when buying Kevlar jeans:
Sit on a bike or squat before buying — the lining position shifts when seated
Knee lining should sit centered on the kneecap in riding position, not standing position
Hip lining should cover the hip bone, not the upper thigh
Waist fit should be snug without a belt — belts allow the jeans to shift during a slide
For beginners, full-leg Kevlar lining is worth the additional cost over knee-and-hip-only panels. The coverage difference is significant and the price gap at entry level is smaller than most riders expect.
Venting Strategy: Opening and Closing at the Right Time
Most riders treat jacket vents as binary — open in summer, closed in winter. The better approach is speed-based:
Below 30mph — open all vents. Airflow at low speed is insufficient to cause chill even in mild cold
30mph to 60mph — adjust based on temperature. Close chest vents first, keep back vents open longer
Above 60mph — in temperatures below 15°C, close all vents and rely on base and mid layer for temperature management
Saribco Industries builds adjustable ventilation into MeshTech and textile jacket lines specifically because fixed ventilation forces riders into this binary open-closed approach. Zippered vents that close fully at the collar and chest give riders genuine control across the temperature range rather than a single summer-or-winter setting.
Kevlar jeans in hot weather, mesh vs perforated leather heat, textile vent timing, UV damage on fibers — everything hot climate riders need to know before summer riding.
Textile jacket repair, zipper replacement, armor pocket fixes, and leather patching — what you can fix, what you can’t, and what it costs versus buying new.
Are textile jackets safe on highways? Are mesh jackets safe at speed? Real abrasion data, slide distances, women’s fit gaps, and honest material safety comparison.
Can you wear a mesh jacket in winter? Yes — if you layer correctly. Wind chill math, thermal base layers, liner compatibility, and what to wear under a textile jacket explained.
Step-by-step washing guide for Kevlar jeans, textile jackets, and mesh gear. Armor removal, detergents to avoid, drying methods, and how to stop membrane damage before it happens.
Mesh, Kevlar jeans, textile, or leather — which actually lasts longer and costs less per year? Real lifespan data, cost-per-year math, and material comparison no one else covers.